Shure SM57 Mods
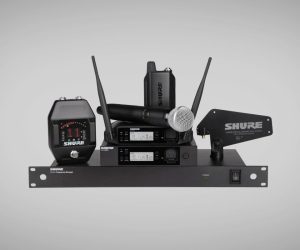
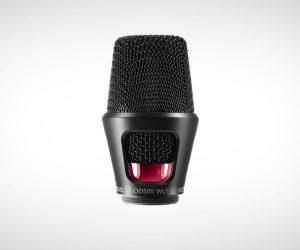
The Shure SM57: One of the most used microphones on the planet, and cited by many an engineer as their ‘desert island mic’. Originally introduced in 1965, the low impedance unidirectional dynamic workhorse boasts an impressive endorsement: the SM57 is the only microphone to be used for US presidential speeches since its introduction back in ’65.
The SM57 traces its origin to 1937 when Shure engineer Ben Bauer developed the Unidyne, which had a cardioid pattern. In 1959, Shure engineer, Ernie Seeler advanced the design considerably with the Unidyne III. Nowadays, the SM57 offers an 40Hz–15kHz frequency response, incredible durability, along with the distinction of being used on pretty much every rock record since 1965 – apparently three quarters of your music collection will have an SM57 involved at some point.
From guitar and bass cabinets, vocals and acoustic instruments, through to the microphones’s penchant for miking snare drums, the SM57 has captured pretty much anything that makes a noise – both live and in the studio. It’s known to sound good on anything due to its “carefully contoured presence rise”, sometimes less flatteringly referred to as ‘midrange honk’. Being such a versatile microphone, studios and touring companies keep plenty of SM57s on hand. It was perhaps inevitable that folk began dabbling with the inner workings of the mic and making modifications.
The most common modification is to remove the SM57 transformer. This shouldn’t take more than 20 minutes. The first step is to unscrew the barrel of the mic. Don’t simply remove the capsule from the top. The barrel could take a bit of force to unscrew but it will loosen. See the image below for an idea of which section to unscrew. Once apart you’ll have access to the wiring and you can disconnect the wires coming from the transformer to the mic capsule. Snip or de-solder – it’s up to you.

Next, loosen the grub screw clamping the XLR connector at the base of the mic. Screw this inwards (clockwise) toward the connector. This will allow the connector to be removed from the SM57’s body. Again, snip or desolder the wires connecting the XLR to the transformer.
Now for the transformer removal. Boil a saucepan of water and pop the mic body in. Yes you read that correctly. Boil up that mic body to soften the glue surrounding the transformer. It won’t take long and you’ll be able to extract the little transformer easily. Prod it out with a screw driver if necessary, then hurl it in the bin – the boiling water will have killed it anyway. You could also use a heat gun to do this if you’re banned from executing such jobs in the kitchen using the stainless steel cookware. Get rid of the residual gluey gunk in the mic body and let it dry. A useful tip is to spray-paint the body a bright colour so you’ll never be confusing your mod’ed SM57 with your standard ones.
Finally, put your mic back together, rewiring the XLR back to the capsule. Wire the positive pin from the capsule to Pin 2 of the XLR mic cable connector (hot/+), and the negative pin from the capsule to Pin 3 (cold/-), and leave Pin 1 as ground. Some web sources advise using shielded mic cable for this but the idea is a fallacy. The mic body itself shields the cabling, and besides, the wiring is balanced. Any hum induced by the internal wiring should be cancelled out by the balanced system. Another tip is to twist your wiring up in an anti-clockwise direction before you screw the barrel back together. Then when you screw the barrel back on the wiring will unravel and you’ll avoid the possibility of twisting those wires up too tightly and possibly pulling on a solder join to the point of breakage.
Once you plug in your newly mod’ed SM57, you’ll find it doesn’t have nearly as much gain. You’ll lose somewhere around 10dB, which is actually an advantage for use on snare drums. In fact, you’ll find it’s better for miking drums in general. The other sonic aspects you’ll notice are an increase in bottom end reproduction, and you’ll lose a lot of that ‘midrange honk’ – and, hey, it’s yet another flavour you can use in your recording. Remember, this is something you can try at home, but it will absolutely void your warranty. That said, I’d doubt an SM57 has ever failed and been sent back to Shure under warranty anyway. They’re that indestructible. [BW]


Small point of order… on all of my SM57s, the ‘grub screw’ has backwards threads, so that turning it clockwise pulls it towards you and tightens the connector to the barrel. It’s counterintuitive, but at the same time it’s actually more logical because you turn clockwise to tighten.