


Tape Return
One man’s journey from computer-based recording back to tape.
14 January 2018
Story: J. Walker
When I started out on my recording journey as a very green 13-year old, digital recording was barely a thing at the high-end of the recording business let alone for the home enthusiast. My first experiences of overdubbing consisted of bouncing audio between two cassette decks with horrendous amounts of noise and audio degradation. My idea of hi-fi was saving up for a chrome II tape and using the Dolby noise-reduction switches on my crappy cassette decks. Nevertheless, I was hooked very early on the possibilities of recording sound onto sound. It’s probably safe to say I experienced the very worst aspects of analogue tape recording right at the start — terrible noise and degradation issues, very limited track counts and the necessity of un-redoable submixing.
CROSS TALK
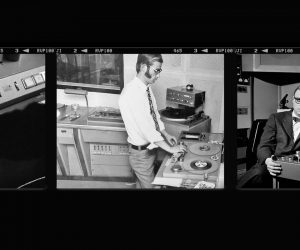
As the years went by I progressed from cassettes to four-track ¼-inch, to eight-track ½-inch multi-track machines and entered the world of high-fidelity tape recording. With my all-round recording skills steadily improving, those early experiments served me well. I knew how to squeeze the absolute maximum out of every device I had, I knew how to make on-the-fly decisions that would benefit the final outcome and how to keep things lean and mean. I loved tape and the discipline of recording to simple low track-count machines. Still, once I got my first hard drive computer recording system in the ’90s, my tape machines and analogue mixers quickly got sold off or leant out to unreliable friends, until all I had left to show for all that earlier analogue know-how were some boxes of old reel-to-reel tapes.
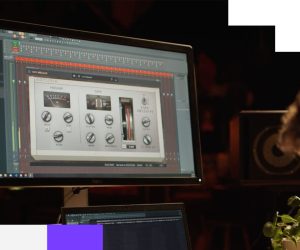
I jumped boots first into the wonderful world of digital recording and didn’t look back. I couldn’t believe the fun I was having flipping things backwards, racking up big track counts, exploring the emerging world of digital plug-ins, looping beats, cutting and pasting, totally re-arranging songs post-tracking and all the other previously impossible things the new technology allowed. I still had friends who worked with analogue tape machines and consoles, now and again — where the budget allowed for pro studio time — I did too, but mostly I stayed happily in the box until about three years ago.
BACK TO THE FUTURE
I’m still not sure exactly what made me jump back into analogue again. I’d tried the summing box approach but found it wasn’t for me. Retro purists banging on about how ‘warm’ and ‘human’ analogue tape sounded didn’t persuade me either — most audio professionals think whatever gear they’re using is the best, whatever gear that happens to be. My clients almost always required recalled and rejigged mixes (sometimes months after the initial sign-off), so I definitely wasn’t interested in a pure analogue-only approach. Nevertheless, the truth was I kept hearing sounds in my head I wasn’t able to conjure with all the plug-in compressors, tape emulators and ‘warmth’ simulators in my digital arsenal. I was also feeling a physical need to stop looking at blue lit screens so much. VU meters and spooling tape suddenly seemed much more appealing. I wasn’t expecting some kind of ‘Halleluya’ moment when I first put a guitar to tape again, but I thought if I got a decent tape machine it might be a pretty cool weapon to add to my existing gear, both as a tracking and processing tool. It would also take me down some alternative paths process-wise, and hopefully help me make some albums with a different-but-good sound to them. Having made this decision, my mission was to find a good machine with a form factor that fit my workflow.


ROLL CALL
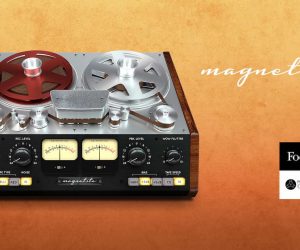
After the earlier mono and two-track machines of the ’40s and ’50s, track counts quickly expanded towards the end of the ’60s. By the mid ’70s, 16- and 24-track machines were the norm, and the technology had matured in terms of stability and sonic quality. The great American tape machines were made by Scully, Ampex and MCI. Studer and Revox were the high-end European equivalents while the Japanese chimed in with great machines by Sony, Otari, Teac, Akai and Tascam from the ’70s onwards. By the early 2000s, reel-to-reels were more or less defunct as a manufacturing concern so most machines on the market today are between 25 and 40 years old, a sobering thought when you consider these are some of the most mechanically complex recording devices ever made!
I eventually settled on purchasing an early ’80s Otari MX 70 one-inch 16-track machine. Not the ducks nuts as far as brands go, but I had worked on Otaris before and knew they were nice sounding, reliable machines. I bought the Otari from a collector who was meticulous with his maintenance, meaning I knew I was getting a solid machine that had been regularly serviced and was in good condition. The seller also threw in a second identical but non-functioning machine for parts (a major bonus), along with a spare remote, take-up spools, 16 noise reduction modules and a full technical manual. I really liked the idea of the 16-track one-inch format. It was a good fit for my digital set-up’s I/O count plus one-inch tape is a much more affordable format compared to two-inch which costs upwards of $350 per reel (not something some of my more budget-conscious clients would relish). Tape is sold in Australia via several online stores and is best bought in batches of five or 10 to get a discounted rate. $500 got me five reels of lovely brand new Quantegy 499 1-inch tape (a hi-bias format that fit the way my machine had been set up).
In terms of tape formats, many would argue that the wider the tape the better the recording quality (for instance Jack White’s studio proudly records to an Ampex eight-track one-inch machine), and there is certainly some truth to this argument. Perhaps because of my indie DIY background however, I actually prefer the sound of a more slender tape width as I feel I can hear the tape sound more clearly. If I wanted clean recordings I had the digital option but for tape recordings I knew I wanted to hear as much of that ‘tapeness’ as possible.
TALE OF THE TAPE
After some tedium getting appropriate cabling and patch bays in place (another hidden cost), I was ready to hit record and see whether all this fuss had been worth it. Having braced myself to be, perhaps, a little underwhelmed, I was pleasantly surprised by how my initial electric guitar, bass and drum recordings sounded. Further experimentation and then some full band tracking got me more and more excited about the sounds coming back off tape. So what was I getting excited about exactly?
Firstly, I was hearing the more obvious and much touted benefits of tape that, to some degree, I expected — natural tape compression did indeed seem to glue everything together in a noticeably pleasing manner. Drum kits and guitars benefitted from a slightly smoothed top end, transients sounded sweeter and less harsh, vocals seemed bolder in the midrange and smoothed out up top meaning less annoying mouth clicks and lip-smacks to deal with. What I wasn’t expecting were a few additional benefits that perhaps don’t get mentioned as much as they should in digital versus analogue debates. For one, there was a definite sense of midrange guts and power coming off the Otari that sometimes really blew my socks off. Some sources felt like they were on steroids compared to my usual DAW sounds. Passages that were meant to sound big, sounded big! Perhaps related to this was the extended dynamic range the tape recordings exhibited. For whatever reason, it seemed the relationship between the loudest and quietest passages simply ‘felt’ better. Certainly, this dynamic behaviour is more like my favourite old vinyl records than contemporary digital recordings, so perhaps there’s some psychological and historical elements at play there. Finally, there was the undeniable fact that when I (and the bands I worked with) listened back to bed tracks we all felt like we were listening to something that already sounded good. Often when listening back to digital beds with a band, I find I’m immediately jumping in to whack a few compressor plug-ins on to show a band how things will ‘eventually sound’. With the Otari there was no such need — the integrity, authority and overall vibe of my standard mic and instrument setups were undeniably magnified by this medium. The jury was in, tape really did sound bloody good!


HEAD BUMP
Once my inner jury was in, I started making albums predominantly on tape. I’d still run everything off to my DAW for mixing at the end but increasingly I and the artists I was working with were creating and shaping songs via the early ’80s magic of the Otari company and Quantegy one-inch tape. Layered indie folk sounded great through this machine, electro-pop with multi-tracked female vocals sounded great through it, rock ’n’ roll sounded great through it! Everything was going so well… until one fateful 40-degree summer day when my studio was hit by a multi-spike power blackout.
I had no power for about 24 hours and the glorious Perch Creek, who I was recording at the time, were left high and dry. When we finally got mains power back I quickly discovered my previously quiet Otari MX-70 was a maelstrom of noise (it sounded like Bells Beach on an angry day in there), faulty circuits and dead channels. Fortunately I had the amazing Geoff Williamson to call on for in-depth technical assistance and a whole spare machine to grab parts from, so while Geoff hauled the Otari off to his workshop up in the hills I reverted, tail-between-legs, to my previous in-the-box workflow. The repair process did in the end require a bunch of spare cards to be cleaned up, as well as new relays installed (which turned out to be the main problem) but it did take a long time to track down all the faults and get everything right again. By the time I was hitting record with the reels turning again it was several months later and, despite Geoff’s generous rates, I was out of pocket for almost as much as I’d spent on the machines in the first place!
While all my outboard and digital gear had come through the blackout totally unscathed, the tape machine had copped a terrible hiding and I now have it plugged in through several expensive power conditioners to avoid more painful downtime and expense. The big lesson here is that old gear can be a little frail, and is also not a quick fix. Oh, and you’d better have some spares handy and access to a good tech!
ROLLING ON
A year or two have gone by since those experiences went down and the Otari has been solid as a rock ever since. I’ve tracked some beautiful records to tape for the likes of (the very patient) Perch Creek, Emma Davis, Jordan Ireland, Jen Cloher and Masco Sound System, and everyone has loved the results. The discipline of recording to tape means that everyone is very focused during the initial bed-tracking phase and it definitely encourages proper ensemble playing with the aim of getting great performances onto tape from the get-go. This process has a different flavour to digital tracking and I do find it a musically superior way to get results, especially in an ensemble situation. There’s more of a sense of occasion when the reels are spinning. Takes can always be comped together later once transferred to digital (or if you’re happy to go there, via cutting and editing the tape itself), and different techniques can bring the tape machine back into play further downstream in the album making process (see the sidebar about getting the most out of your tape machine). Mostly, it just sounds great, and it really is nice to be standing with a bunch of people looking into the space between the speakers or watching the VU meters bouncing while listening to a take, rather than watching a screen. The hybrid tape/digital workflow has worked really well for me as my tape recording skills seem to complement my digital ones. Ultimately it’s all about personal preferences and workflows — I’m yet to make an album straight off tape but I have loved integrating the tape machine into my recordings and feel like I’m deriving a lot more benefit from the sounds and process of tape recording than I ever thought I would going into it. If you’re reading this, have some recording chops and are thinking about taking the plunge into tape, my advice is — keep your eyes wide open and be aware of the pitfalls, but yes, absolutely do it! If you get a solid machine, you won’t regret it.


RESPONSES