Mix Masters: John Nathaniel Ain’t Worried
The Top Gun: Maverick dogfight football song, ‘I Ain’t Worried’, is a catchy piece of sunshine-pop. Producer John Nathaniel explains how he approached his work on the song.
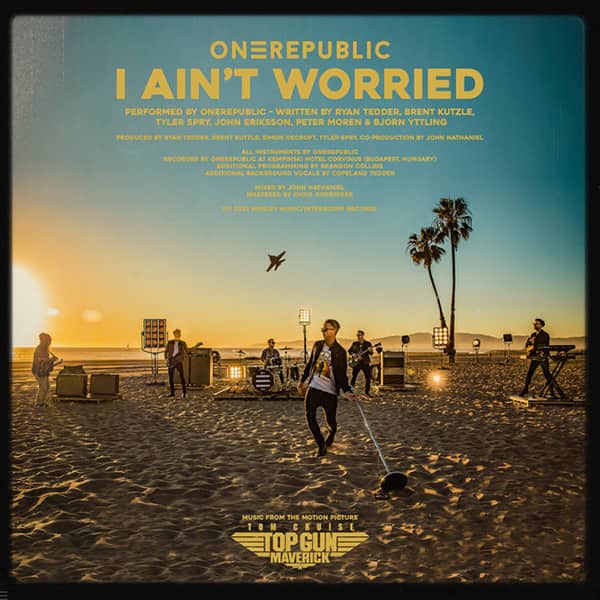
Artist: OneRepublic
Song: I Ain’t Worried
Tom Cruise had already rejected 30 songs before OneRepublic’s principal songwriter Ryan Tedder was approached by Paramount Pictures. The production brief called for a bright, cheerful song, and would be placed in a scene depicting the film’s protagonist enjoying a rare, carefree moment. Songwriting duties were shared by Tedder, OneRepublic bassist Brent Kutzle, producer Tyler Spry, and the members of Swedish band Peter Bjorn and John. Together they penned ‘I Ain’t Worried’, a sunny pop song that went on to be one of OneRepublic’s biggest hits.
The song was written and recorded prior to producer John Nathaniel’s involvement in the project, with the demo being tracked in a Budapest hotel room while OneRepublic were in Hungary for the 2021 MTV Europe Music Awards. Working remotely from his home studio, Nathaniel began to fine-tune the track to give this pitch-to-studio some punch — and after Tom Cruise’s presumed approval he tightened up the production.
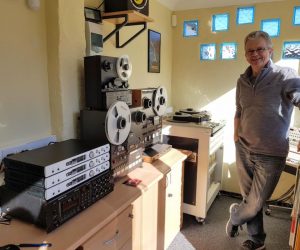
Nathaniel set his studio up in 2012 as a hybrid space. It has an impressive amount of gear, including: an API 512 C, BAE 312 A, and Mercury M76m/1 mic pres; an Electra EQ, Kush Audio Clariphonic EQ, two API 560 EQs; Shadow Hill Dual Vandergraph mastering compressor, SSL Fusion, and a Dangerous Bax EQ and Compressor. There’s also a Teletronix LA2A, a Universal Audio 1176 compressor, 6167 channel strip, and Apollo X8 interface. The studio also boasts Yamaha NS10 and K&H 300 monitors, a Neumann sub, a Dangerous Monitor controller, and a variety of guitars and keyboards, including a Prophet 6 and Moog Sub 37.
We asked John to talk us through his Logic session. He ends up with an impressive 183 tracks — with drums and percussions on top, then effects and vocal shouts, bass, guitars and keys, vocals and background vocals.
FIRST IMPRESSIONS
John Nathaniel: I was not aware of the studio’s brief — it was simply, ‘Hey, can you make the song sound as immediate and as good as possible?’ So I polished a few production elements to make it sound more exciting. A song’s lyrics will often influence what I do. In this case the lyrics gave me a strong mental image — it had to be swaggy, no-worries, and cool-as-a-cucumber. The whole song felt as if sunglasses needed to be worn to listen because of the swag — and indeed they wear sunglasses in the movie.
PRODUCTION VALUES
I can’t comment on how the whistling and the rest of ‘I Ain’t Worried’ came into being as I wasn’t part of that process, but I did have input on the production of it. We liked the cool, natural, ‘indie’ intonation of the whistle so we left it untouched. Tuning is great if you’re doing a super pop record, but the vibe of this song called for those beautiful imperfections to be left intact to give it a more human feel. If you put a song like this right bang in tune it can sound over-polished and may lose its character. I placed a few effects like saturation and reverb on the whistle, and the intro was low-pass filtered for a more lo-fi feel, but after the first chorus a more hi-fi version can be heard coming through.
While mixing I always want to keep the songwriter’s original intentions in mind, and I try to support this with rhythm and tone. In the case of this song, it had a retro-meets-modern sound, so I worked with things like slap echo and vintage-style reverbs. In general, you want to get the vocals feeling awesome before moving on, but in this case I also set my mind to getting the drums knocking a little harder. Recognising these needs is all part of creating an aesthetic for the song.
CLIENTS & MIXING
One thing I’ve learned is that if you want to do something significant to the mix, it’s a good idea to initiate a dialogue rather than surprise the client. While mixing, I’ll regularly reference the original demo because that’s the sound the band will have become familiar with. I also try approaching them with: ‘I’m imagining that guitar in the chorus sounding a bit quieter/louder’, and then ask them how they feel about the idea. Mentally preparing the client for your suggestions means that they won’t be blindsided, which keeps them open to further suggestions.
There are also mixes where the artist or producer wants you to be bold — to craft a stronger sonic identity for them. Here you can be more creative, but it’s still good to respect the work of the artist and producer, so clear communication remains a key element for success here too. Because I have a long-term relationship with OneRepublic they are incredibly open to suggestions — if I’m hearing something a different way I can easily have that dialogue with them before touching it.
Everyone can suffer from the psychological/creative blockage of ‘demo-itis’, where you start to like something that you’ve been stuck on for a while. It’s the Stockholm Syndrome of writing and mixing. At the same time, people hire you for your taste and decision making, so if they trust you to make those decisions, that’s something you should try to remain focused on.
Everyone can suffer from the psychological/creative blockage of ‘demo-itis’, where you start to like something that you’ve been stuck on for a while. It’s the Stockholm Syndrome of writing and mixing
PRACTICAL PRODUCTION
When beginning a new project, I generally start with whatever grabs my attention — with whatever the heart of the record is. If it’s a piano piece with only a little drumming then I’m not going to start with the drums. I’ll start with the piano, or maybe a vocal. Because the groove is a foundation of ‘I Ain’t Worried’ I started working on getting a rough balance between the drums and bass. I then worked on the guitars, which have a gnarly, ’60s slappy reverb/delay. (I love that stuff!) Then I worked on the vocals, and at the end I looked at the brass stabs and other effects. I always save these effect tracks til last because they don’t really make or break the record.
DRUMS
With regards to the drums, there were three different kicks. There’s a short, click-y kick that I added because I wanted to get a bit more attack. I used the Drum Replacer plugin, found a sample I liked, and made sure that it was properly aligned, and in phase. Using the FabFilter Pro-Q3 I added a little bit of top and some higher midrange, dipping a bit around 250Hz and boosting some lows at 100Hz. Then I had the Oeksound Spiff pushing some attack. That plugin is like a transient designer, it does something really unique and controlled. Finally, there’s the Korvpressor compressor, to give a polished, punchy sound.
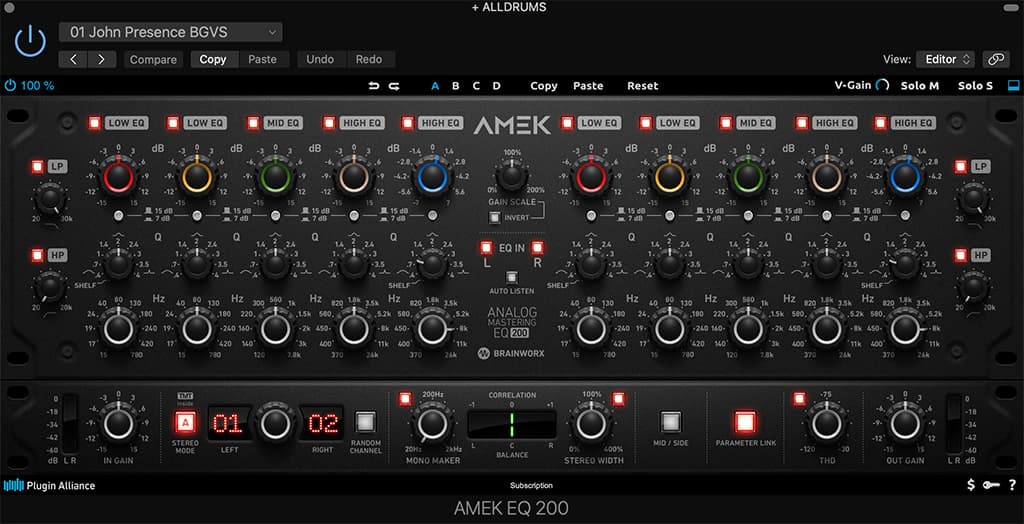
The drums and the other drum elements were sent to the ‘All Drums’ bus, where I added the Waves OneKnob Filter in one section, and again with the Korvpressor, and then the Amek EQ. Generally, this bussing process is a polish. If I turn off the effects on the bus, it won’t fall apart, but you’ll definitely lose a bit of sweetening. The Amek EQ200 was adding a little at 8kHz, like 0.6dB for a smidge more forwardness. It’s a breakbeat groove, so I wanted the sound to be punchy and snappy.
BASS
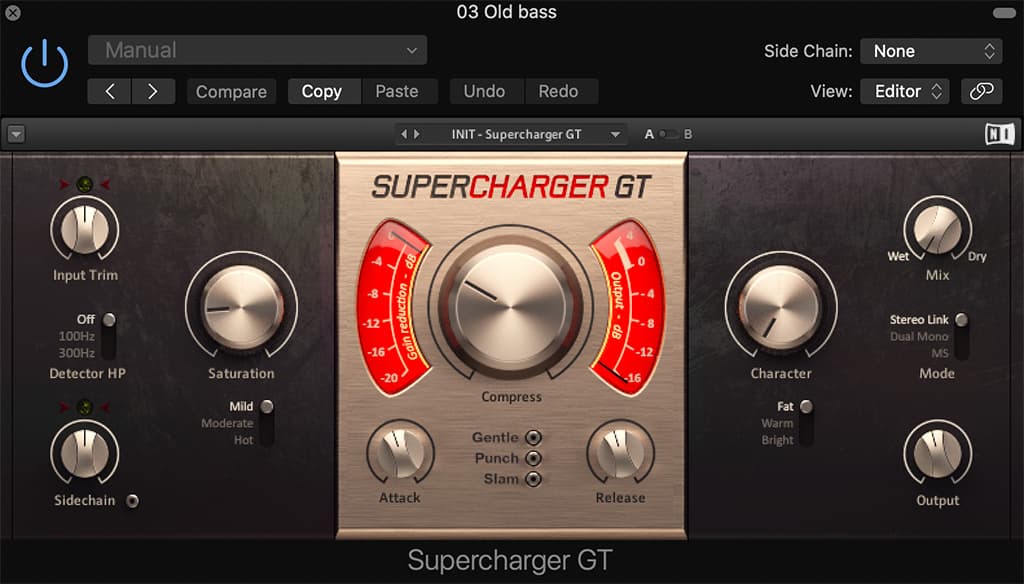
There are several bass elements; an 808 and two Reveal Sound Spire bass tracks; and the ‘Old Bass’ (from the original movie session), ‘Bass Slide’, and ‘Bass Wurl’ tracks. These aren’t all playing simultaneously, apart from the Spire bass and live Old Bass tracks, where the Spire was only adding a little sub content and extension to the live bass. On the live bass I added the FabFilter Pro-MB, which compresses from 74Hz to 346Hz — giving me a bit more stability in that range. Then I had Native Instruments’ Supercharger GT (I love that thing, it’s so badass!), where I cranked the saturation and added a bit more compression. One important thing to keep an eye on is level-matching because you can easily trick yourself when going into a compressor/saturator. When it’s 2-3dBs hotter you can be inclined to think, ‘Wow, this sounds better’, but really it’s just louder.
VOCALS
Getting the balance right between Ryan’s lead vocals and the ‘gang’ vocals was the main challenge. The gang vocals add character, but they also take attention away from the lead singer if they’re too hot. The gang vocals are great and add a lot of hype to the mix, but I wanted to keep Ryan centre stage. The name of the game was finding a level that excited the chorus while still being able to hear the character of the lead vocals clearly.
I generally spend a lot of time on vocals, and in this case, there was a combination of different effects to achieve the sound. For example, there’s some distortion on the lead vocals, using Waves’ Manny Marroquin Distortion plugin. I’ll usually use this plugin on tambourines or drums, but in this case it worked really well on the lead.
I also gave the lead vocals some extra midrange, which I pushed with the Waves Vitamin Sonic Enhancer. I’ve also got the Slate Virtual Mix Rack, with the FG-N EQ, the FG-Stress compressor, and the FG-Bomber, which I used to add transient enhancement. The mix knob of the FG-Stress was at about 18% because I was really slamming it, and the Bomber was only active in the verses to add attack. It sounds like I have loads of plugins on the vocals, but they’re each only doing a tiny bit. All those small enhancements really tend to add up.
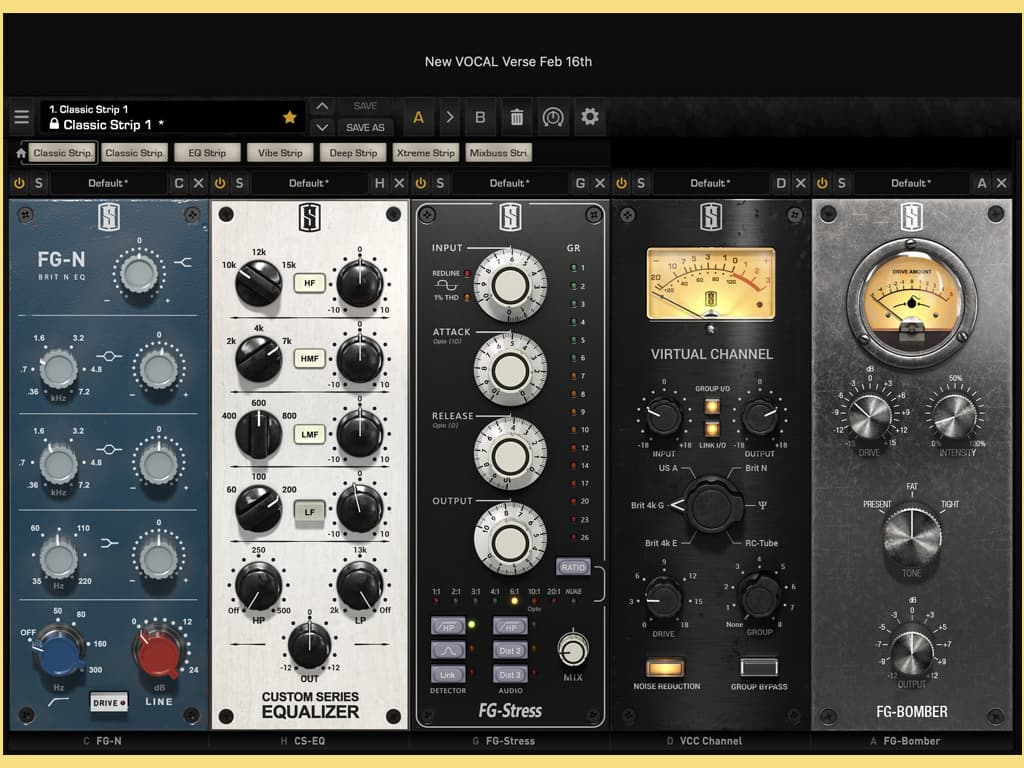
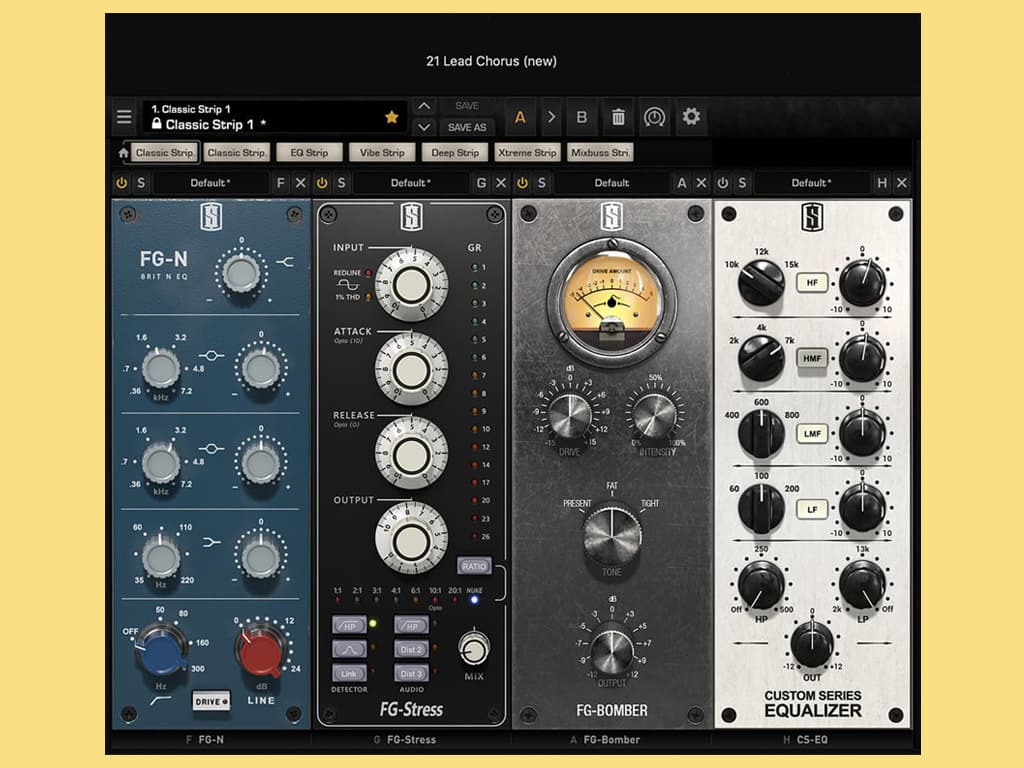
The send-effects on the vocals are also a big part of the ‘sauce’. I had a Soundtoys EchoBoy doing some very light quarter note repeats, set to the Space Echo setting — which I think is based on the Roland RE 201. The EchoBoy is one of my favourite delays. I also used the UAD Galaxy Tape Echo, which is so gnarly, it gets me those vintage vibes right away. Then I had the Valhalla Vintage Reverb with a two-second reverb, and high-passed quite heavily. I also narrowed it down a bit as it’s such a wide sounding reverb — a bit too grand for this kind of song.
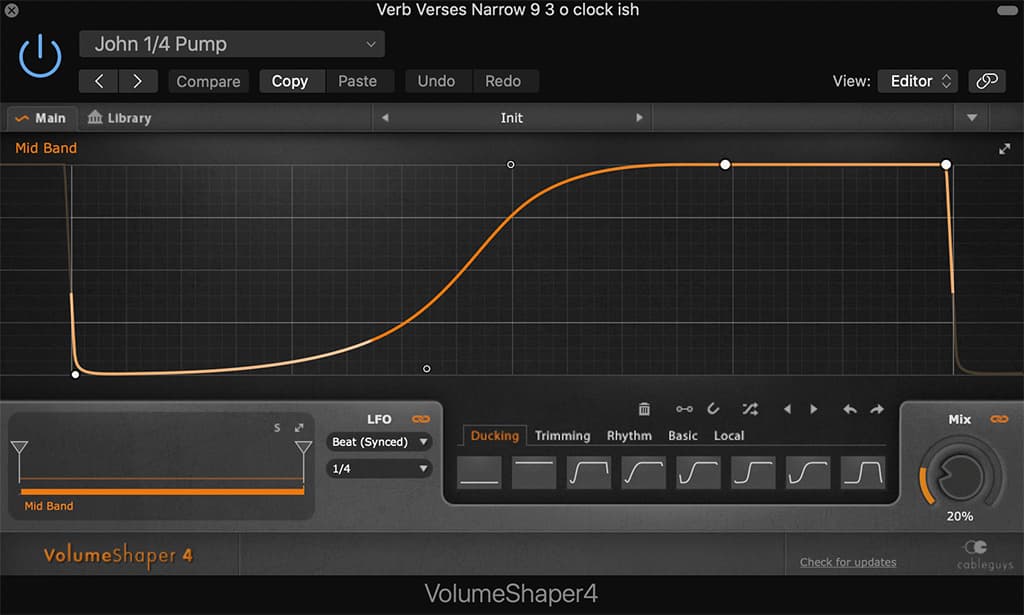
I’ve also got a bit of side-chain on the reverb where the VolumeShaper4 created some light quarter-note pulses to add movement to the reverb. After that, there was the SoundToys MicroShift, which is a doubler to subtly detune. I have the same effects on the chorus section too, but they’re balanced a bit differently. And then at the end you’ve got a slap from the EchoBoy, set to StudioTape, 72ms on the left, 92ms on the right. The delay offset is to avoid phase issues, as using the same delay or effect settings twice can get you into trouble. On the delay slap send, I’ve got the UAD Pultec MEQ-5. I dipped out some 300Hz and I pushed 2k, just to make the vocals more present and to have the effect sit a certain way.
For the pièce de résistance I have some extra tails on specific phrases. I copied regions where I wanted more reverb than on other tracks, and added a FabFilter Pro-Q3 before the verb, cutting out low- and high-end, and then applying the Valhalla Vintage Verb. This had slightly longer tails than the send on the lead. I blended the ‘1980s Concert Hall’ and ‘1970s Concert Hall’ as inserts on the chopped regions, with different modulation and filter settings. I also shaped the envelope a bit differently. If you listen to the reverbs, you’ll hear that the ends of certain phrases are a little wetter in verses. This creates depth and contrast.
MIX WRAP
To conclude, on the stereo mix I had the bx_digital EQ3, but not as an EQ. I used it purely for its ‘Mono Maker’ summing tool. It flips everything under 80Hz to mono. I also used two analogue pieces of gear to add a bit of glue and polish. The Dangerous Compressor is hitting the song maybe 2dB in peak sections. I like the way this compressor tightens the punch in a very transparent, 3D way. I also have the Bax EQ pushing a bit of 74Hz and 7.1kHz, and the filter section active at 12Hz and 70kHz.
Where the signal comes back into the digital domain, I applied the Oxford Inflator, which adds a bit of presence and harmonic content.
Next, the UAD Curve Bender EQ pushes half a dB at 20k, just to add some air. (I wasn’t kidding when I said that these things aren’t doing much!) And finally, I have the iZotope Ozone 9 Imager doing some light imaging enhancement to make it sound a little more polished. We then sent the mix to the brilliant — and super-cool — Chris Gehringer, who mastered it for us.
So, as you can see, a lot of my mix work was about balancing the lead vocals and gang vocals. There are tons of gang vocals, especially in the choruses. It’s those gang vocals that give the song that cool ‘sunglasses’ sound I was talking about.










RESPONSES